Configure OIDC with GCP WIF for Harness CI Cloud builds (beta feature)
This tutorial shows how to Configure OpenID Connect (OIDC) with GCP Workload Identity Federation (WIF) for the Continuous Integration hosted builds workflow (beta feature). For more information on OIDC, go to Use OIDC.
This feature is currently behind the feature flag PL_GCP_OIDC_AUTHENTICATION. Contact Harness Support to enable the feature.
Prerequisites
This tutorial assumes you have experience with GCP workload identity providers. For more information, go to Identities for workloads in the GCP documentation.
In addition to a Harness account, you to create a GCP workload identity provider.
Set up a GCP workload identity provider and Harness connector
To create a GCP workload identity provider, do the following:
Set up an identity provider in the workload identity federation with the following configuration. For more information, go to Manage workload identity pool providers in the GCP documentation.
a. Name: <User_defined>
b. Issuer: https://app.harness.io/ng/api/oidc/account/<YOUR_HARNESS_ACCOUNT_ID>
c. Attribute mapping:
- Google.subject = assertion.sub
- attribute.account_id = assertion.account_id
Grant access using the connected service accounts for GCR/GAR.
a. Select the service account that has permission to push/pull GCR/GAR.
b. Select principles (identities that can access the service account).
- Only identities matching the filter
- Select account_id = <YOUR_HARNESS_ACCOUNT_ID>
Configure your GCP connector in Harness.
Create a GCP connector
To configure your GCP connector in Harness, do the following:
Open a Harness project, and then select Project Settings.
Under Project-level resources, select Connectors.
Select New Connector, and then, under Cloud Providers, select GCP.
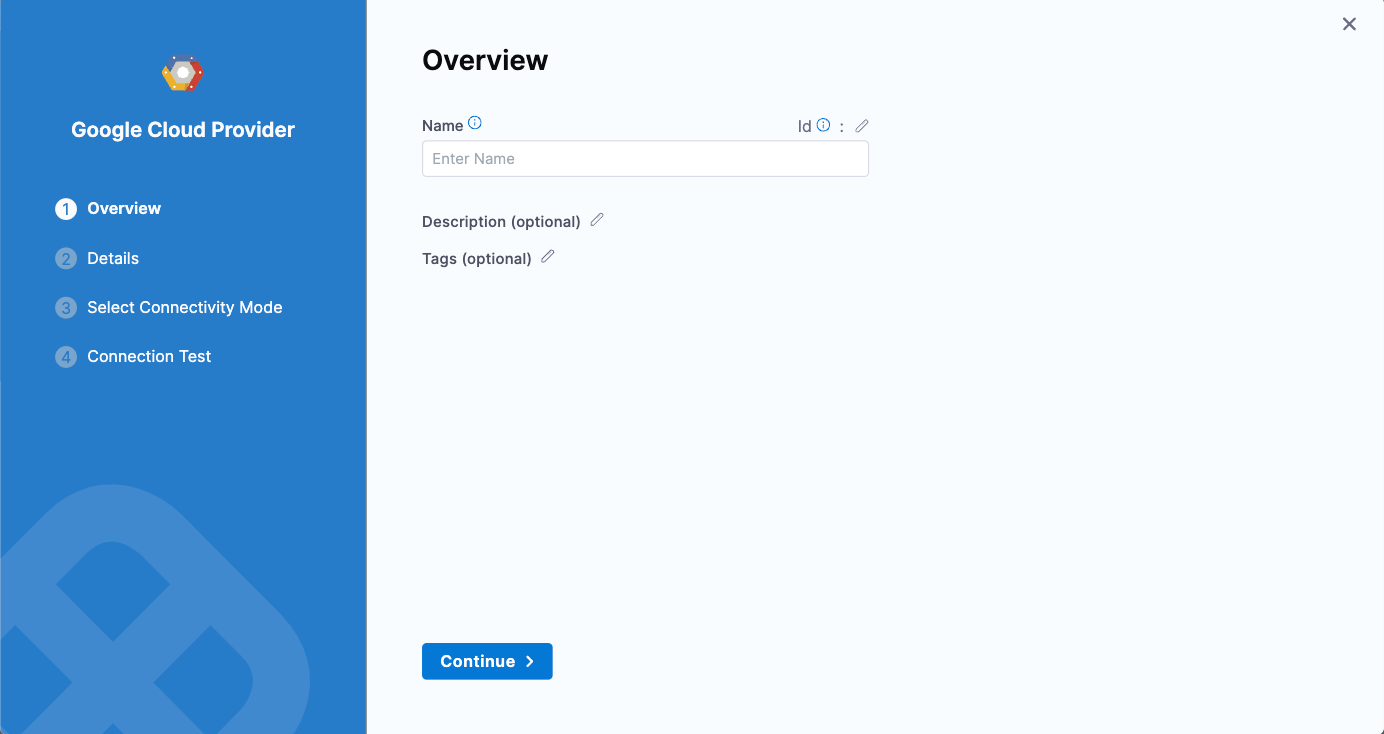
Input a Name for the connector. Description and Tags are optional.
Harness automatically creates an Id (entity identifier) for the connector based on the Name.
Select Continue to configure credentials, and then select OIDC.
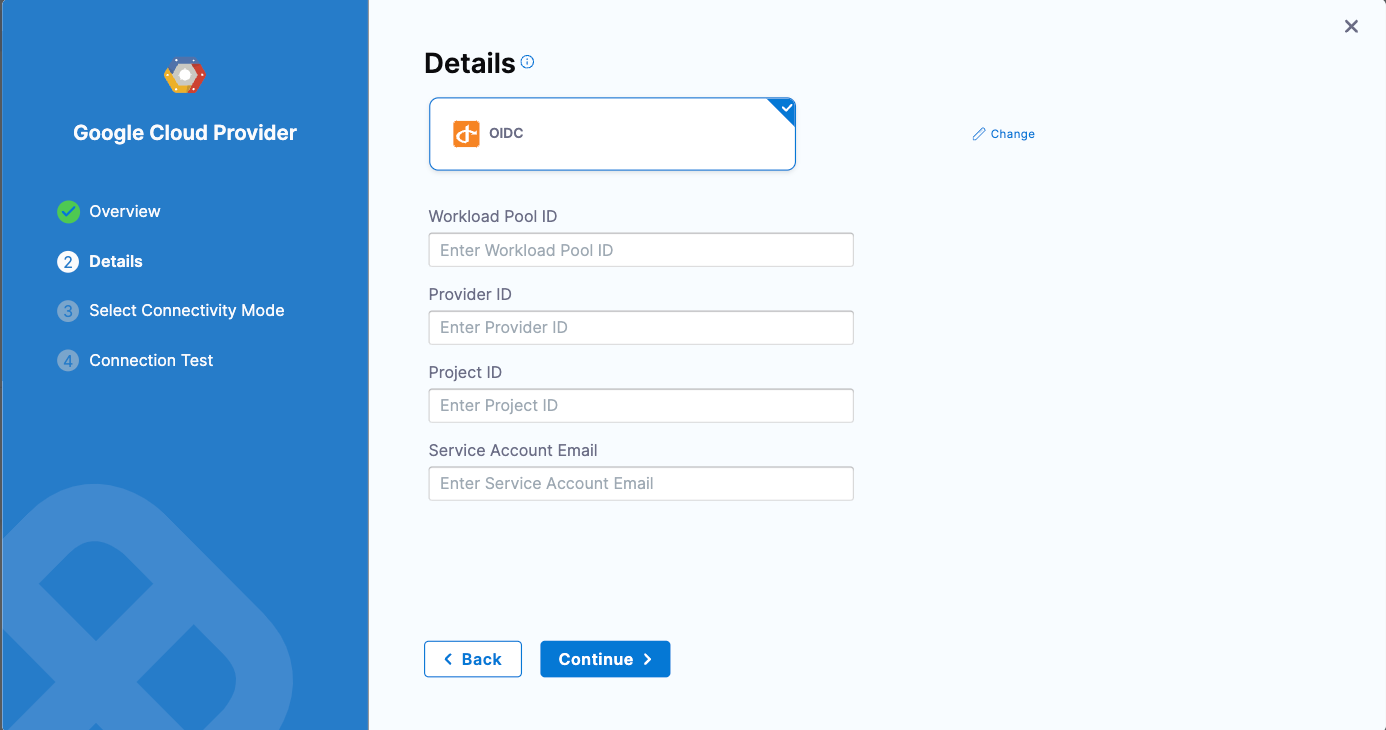
Enter the following.
Workload Pool ID: This identifies the workload pool created in GCP, and it is the
Pool IDvalue. To get the Workload Pool ID, go to Manage workload identity pools in the GCP documentation.Provider ID: This identifies the OIDC provider configured in GCP, and it is the
Provider IDvalue. To get the Provider ID, go to Manage workload identity pool providers in the GCP documentation.Project ID: The project number of the GCP project that is used to create the workload identity federation. To get the Project ID, go to Creating and managing projects in the GCP documentation.
Service Account Email: This is the service account that was linked to the workload identity pool in the last step.
Select Continue to proceed to Select Connectivity Mode.
Select Connect through Harness Platform for OIDC workflow.
Select Save and Continue to run the connection test. If the test succeeds, select Finish. The connection test confirms that your authentication and delegate selections are valid.
After you configure the OIDC connection and role, the Harness hosted build for CI can retrieve the temporary credentials from the GCP Security Token Service (STS). While running the Build step, you can use the GCP connector to enable this workflow.
Troubleshooting GCP connector errors
For troubleshooting details, go to Troubleshooting GCP connector errors.
Create a pipeline to publish the artifact to GAR using OIDC
Now you're ready to create a pipeline and publish the artifact to GAR using OIDC.
To create your pipeline, do the following:
In Harness, select your project, and then select Pipelines.
Select Create a Pipeline.
Enter a Name for your pipeline. Description and Tags are optional.
Harness automatically creates an Id based on the name.
Select Start.
Select Add Stage, and then select Build.
Enter a Name for your stage. Description and Tags are optional.
Harness automatically creates an Id based on the name.
Under Infrastructure, select Cloud.
Select your Platform options, and then select Continue.
In Execution, select +, and then select Add Step.
Under Artifacts, select Build and Push to GAR.
Enter a Name for your step parameter.
Harness automatically creates an Id based on the name.
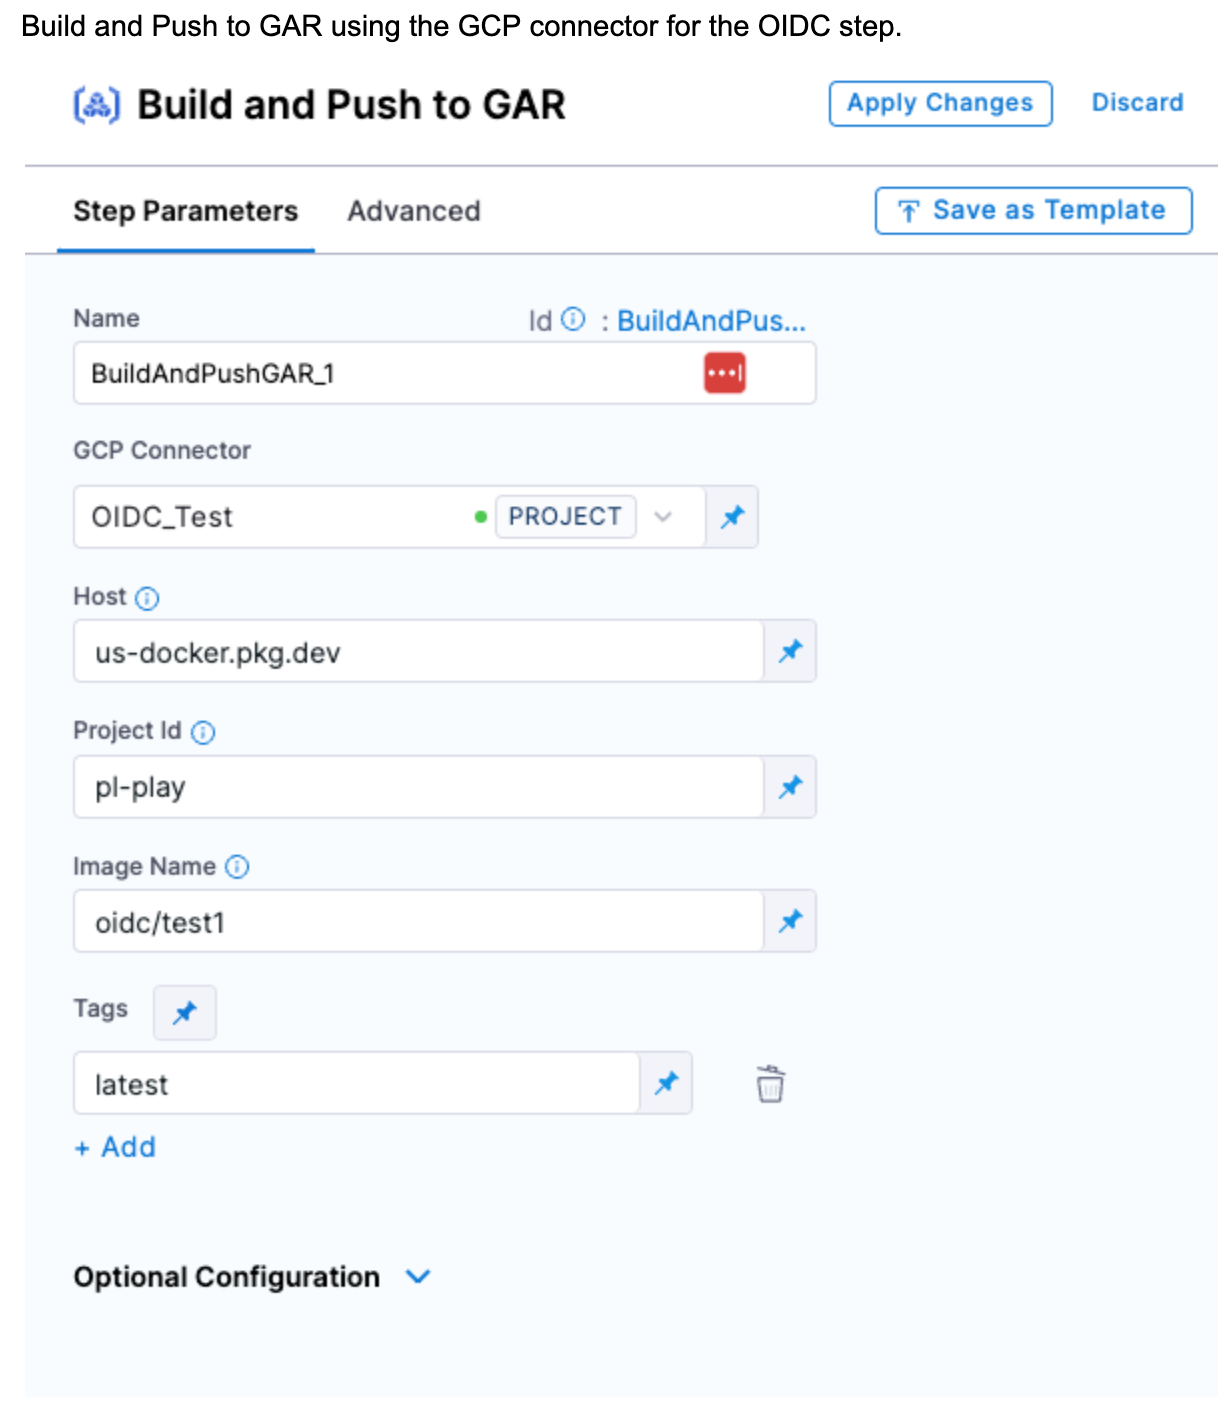
Under GCP Connector, select the GCP connector you set up for the OIDC workflow.
Complete the remaining fields, and then select Apply Changes.
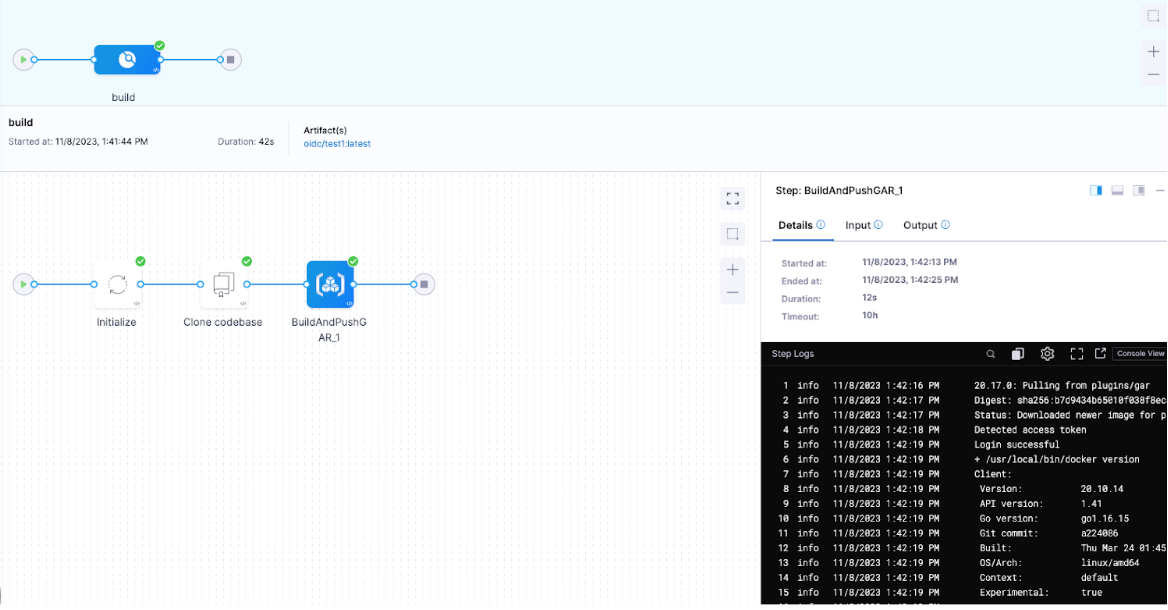
Run the pipeline.
The pipeline uses the Google STS to exchange the tokens and access the GAR, as shown in the step logs.